
![susie [sort of] homemaker](https://blogger.googleusercontent.com/img/b/R29vZ2xl/AVvXsEjNzj9p5XCT9kSf3jxJg3cD2H19PnNMBCr5qmm4zf2uieQ6hzvqjuZsVrVBdmuptuxCzmSmCjl3Z_H0q3wfKYtKmByHkj4BPy89cna85o_ska7J0B3tMrjkkHVXBC4jkk7UUaDhB3c3-BAY/s1600/susiebanner1.jpg)
Wednesday, November 21, 2012
a little holiday decoration
Hung this on the bookshelf (my only form of a mantel) the other day. Lights to make both Thanksgiving and Christmas a little brighter.
Monday, November 19, 2012
preparing for thanksgiving
Since we live in a small apartment, cooking and preparing for the holidays is a little different. Because I also like lists, I thought I might write down a list of things I'm attempting to keep in mind and learn myself, in the hopes that you can share in my adventures.
1. Don't get overwhelmed. The apartment is small, the kitchen is two feet wide (literally), there are books everywhere (sorry I'm not sorry), food to cook, spaces to try and decorate, and cleaning to get done. It's alright. Breathe. It'll be okay.
2. Do something fun or relaxing every day. In between the preparing for holidays, it's nice to do something just for yourself or just with your significant other or family that is relaxing and fun.
3. Start with a clean workspace. I don't enjoy doing this. I don't particularly like handwashing all the dishes, cleaning the bathroom, washing the rugs, hanging all the darn laundry in the teensy closet, and changing the sheets, etc., but holidays, cooking, and life are all made easier if your workspace is reasonably tidy when you start. Expecially the kitchen. If you're cooking, starting with a clean space is sooooo much easier. And there are less gross germs that way. Ew.
4. Make lists. Or set calendar reminders. Or make a diagram. Or set a million alarm clocks, one for each task. Whatever you do, organize yourself for a plan of attack. I'm currently in the process of finishing choosing recipes and sending the husband out for the last of the ingredients -- he has the days off (I don't) and it transfers things from my to-do list to his, which is occassionally helpful. Whatever cooking you're doing, have a plan.
5. Eat food. Seems silly, no? But while you're doing all that cooking and cleaning and organizing, eat some food. Don't forget to eat just because you're standing over the stove all day. And no, cookies don't count as a meal.
A short list, but I have to start somewhere. This is my first Thanksgiving without the large extended family, so the cooking and cleaning are divided between just the hubby and I this year. The good news? I can use all the butter I want and I'll have food to last me for ever. The bad news? Making Thanksgiving food for two is actually pretty difficult. Everyone creates recipes for 10 or 20 or 592 instead of just for two. Oh well. Guess we'll just have to eat it all!
Thursday, November 15, 2012
acorn squash
Have you ever eaten acorn squash? I hadn't, until Tuesday evening.
Last night, our Wednesday night group had a Thanksgiving potluck. Boy, was the food delicious. Most of the food was provided, and attendees were asked to bring desserts. I broke the rules a little and opted to bring a side dish. (I was out of apples for a pie!)
Looking around my teensy apartment, I wondered what would be the best thing to bring.
Aha! Acorn squash!
How daunting. I had never cooked acorn squash in my life. Not to worry. When I'm short on ideas, the Pioneer Woman always comes through with a delicious recipe.
I was so excited while cooking that I forgot to take pictures, so I apologize. I will say, though, that mine turned out as beautiful as Ree Drummond's (Pioneer Woman), except that I went ahead and spooned them out of their skin and into a square dish after they were all finished cooking. The result was delicious, sweet acorn squash that looked like golden brown mashed potatoes.
It disappeared at the pot luck in the first 20 minutes!
I don't know how much of that was true enthusiasm and how much was mistaking my squash for sweet potatoes, but whatever the reason, I'm glad it was eaten.
Now to sort out how to use my pie pumpkin and spaghetti squash. Hopefully I'll remember to take pictures next time.
 |
| photo via |
Looking around my teensy apartment, I wondered what would be the best thing to bring.
Aha! Acorn squash!
How daunting. I had never cooked acorn squash in my life. Not to worry. When I'm short on ideas, the Pioneer Woman always comes through with a delicious recipe.
I was so excited while cooking that I forgot to take pictures, so I apologize. I will say, though, that mine turned out as beautiful as Ree Drummond's (Pioneer Woman), except that I went ahead and spooned them out of their skin and into a square dish after they were all finished cooking. The result was delicious, sweet acorn squash that looked like golden brown mashed potatoes.
It disappeared at the pot luck in the first 20 minutes!
I don't know how much of that was true enthusiasm and how much was mistaking my squash for sweet potatoes, but whatever the reason, I'm glad it was eaten.
Now to sort out how to use my pie pumpkin and spaghetti squash. Hopefully I'll remember to take pictures next time.
Monday, November 5, 2012
eggs
 |
| image via |
"Our previous tests found that eggs from hens raised on pasture — as compared to the official USDA data for factory-farm eggs — contain:
If those are not several good reasons to buy free range eggs from a local farm, then I don't know what is!
Thursday, November 1, 2012
October 21
Things have been crazy around here! The husband and I have had a little more time together between his work schedule lately and the storm that came through here on Monday.
However, I realized I hadn't told you about our exciting adventure that we had just over a week ago! On Sunday, about a week and a half ago, we ventured out to a colonial farm in the area for their market weekend. Doesn't that sound fun? Admission was only $6, and we got some delicious food and an early start on Christmas and fall birthday presents. We spend the whole afternoon walking around, watching the kids' militia march, admiring the wooden goblets, considering buying too many things, and ending up with a few small things. The husband even bought me tea and cute little spice jars!
We did manage to take a couple of pictures with a phone on this trip, too.


What a great way to spend a Sunday afternoon!
However, I realized I hadn't told you about our exciting adventure that we had just over a week ago! On Sunday, about a week and a half ago, we ventured out to a colonial farm in the area for their market weekend. Doesn't that sound fun? Admission was only $6, and we got some delicious food and an early start on Christmas and fall birthday presents. We spend the whole afternoon walking around, watching the kids' militia march, admiring the wooden goblets, considering buying too many things, and ending up with a few small things. The husband even bought me tea and cute little spice jars!
We did manage to take a couple of pictures with a phone on this trip, too.
What a great way to spend a Sunday afternoon!
Friday, October 26, 2012
wives' tale
Crowned in color autumn comes
Topaz peaches, amethyst plums
Ruby jelly, emerald dills
With brilliant gems the pantry fills
Gleaming jewels, sealed in glass
Teasures of the harvest past
Wednesday, October 24, 2012
stir fry!
.JPG)
The other day I made my first stir fry at home! Seems like a small accomplishment, but since I'm not a terribly experienced cook, many things are an accomplishment that might not be to others.
However, perhaps you're in the same boat as I am and never tried this before.
Well, I don't have any pictures of the process to share (got too excited), but perhaps I can share the summary version here and a more detailed recipe/method later when I can talk the mister into taking pictures.
1. Gather all the veggies and meat you want. Just about anything goes. I used whatever I had in the fridge with our farmshare veggies. I had carrots, green bell peppers, little onions that I chopped up, chicken, big spinach leaves, and bok choy.
2. Cut up all your veggies into bite sized pieces. For the big leaves like spinach and bok choy, cut those up too, but set them aside. They go into the skillet or wok last.
3. Heat up some sesame oil in your pan. If you happen to have fresh ginger or fresh garlic (I didn't), the earlier you add it, the better. You don't want to burn it. Add the veggies (minus the leaf-y things).
4. Stir around a bit until everything looks sizzling and partially cooked. Cover with a lid for a few minutes. Maybe 2-3 minutes. Add the chicken before you cover if you're using any. We did.
5. If you need to, add a little water. I didn't need to, but it could be nice to steam the veggies a little. Add the leaves and cover the skillet or wok again. You only want to cook these until the leaves wilt. Don't cook too long or everything will be soggy and unappetizing.
6. When the leaves are wilted, take it off the burner. Add some soy sauce. Add some organic peanut butter (it's more runny than the commercial stuff and works as a make shift peanut sauce). Add a little honey for some sweetness. Season with these things to taste. Stir to mix.
7. Serve warm over pasta or rice.
Voila!
Easy enough, right?
Right. I thought so.
Turned out to be a hit with the husband, although we have differing levels of comfort with the amounts of soy sauce that should be added. Ah, well. I added a little more to mine after it was on my plate!
Friday, October 19, 2012
Wednesday, October 17, 2012
fall and football
.JPG)
.JPG)
Fall is a time for outdoors, including a rousing game of tackle football!
This was a couple of weekends ago, and we had such a good time. Good friends of ours put together a tackle football game and a lovely dinner of Wisconsin Beer & Cheese Soup. The hubby played football, I watched and chatted with a couple of other ladies and gentlemen, and we all got to have dinner. I even talked their children into a game of Apples to Apples afterwards (not that they needed much convincing) with a pro football game on in the background. What a lovely afternoon.
Friday, October 12, 2012
a poem
An Old Woman of the Roads
by Padraic Colum
O, to have a little house!
To own the hearth and stool and all!
The heaped up sods against the fire,
The pile of turf against the wall!
To have a clock with weights and chains
And pendulum swinging up and down!
A dresser filled with shining delph,
Speckled and white and blue and brown!
I could be busy all the day
Clearing and sweeping hearth and floor,
And fixing on their shelf again
My white and blue and speckled store!
I could be quiet there at night
Beside the fire and by myself,
Sure of a bed and loth to leave
The ticking clock and the shining delph!
Och! but I'm weary of mist and dark,
And roads where there's never a house nor bush,
And tired I am of bog and road,
And the crying wind and the lonesome hush!
And I am praying to God on high,
And I am praying Him night and day,
For a little house - a house of my own
Out of the wind's and the rain's way.
And I am praying Him night and day,
For a little house - a house of my own
Out of the wind's and the rain's way.
Wednesday, October 10, 2012
kale chips
Okay. I know, I know. Chips made of veggies? Sounds crazy, right? I think they're absolutely delicious. Salty, crunchy, and actually pretty good for you. The hubby gave a resounding "NO" to them, but he tends to dislike vegetables attempting to be other foods, anyway. He likes all other veggies, just not veggies trying to be things like chips. I, however, devoured them.
I found a great video to use, but I lost the link (I'm sorry) so I'll have to give you my pictures, instead.
(Preheat oven to 300 degrees)
1. Wash and pat dry the kale leaves.
2. Remove leaves from the stem. (You can actually leave the stem on, but it's harder to eat and I just decided to save mine for when I make stock.)

3. Tear the leaves into bite-sized pieces and put all the pieces into a large bowl.

4. Drizzle in a little olive oil (don't need much -- just enough to give a light coating) and a little sea salt (you need less than you think, trust me). Toss with your hands!
5. Spread out all the leaves onto a baking sheet, preferably one lined with parchment paper or an equivalent.

6. Pop in the oven for about 20 minutes or until crispy! Voila!

I found a great video to use, but I lost the link (I'm sorry) so I'll have to give you my pictures, instead.
(Preheat oven to 300 degrees)
1. Wash and pat dry the kale leaves.
2. Remove leaves from the stem. (You can actually leave the stem on, but it's harder to eat and I just decided to save mine for when I make stock.)


4. Drizzle in a little olive oil (don't need much -- just enough to give a light coating) and a little sea salt (you need less than you think, trust me). Toss with your hands!
5. Spread out all the leaves onto a baking sheet, preferably one lined with parchment paper or an equivalent.

6. Pop in the oven for about 20 minutes or until crispy! Voila!

Sunday, October 7, 2012
muffins!
The other day, I noticed I (and we) didn't have enough breakfast food. Mostly, I notice this in the mornings, obviously.
But! This weekend I took a look at my food, looked at the leftover apples, realized the need for breakfast food, and set out to make a batch of apple cinnamon muffins.

Aren't they pretty? I used this recipe, but instead of use 2 cups of apples, I used two whole (and good sized) apples. They don't rise and expand as much, but I got several smaller muffins out of the batch and the apples made them very moist and delicious.
Friday, October 5, 2012
food
"It seems that, in America, our belief in getting more for less, faster, often outweighs common sense about the intrinsic tie between food quality and health. Paying more for the foods we eat can improves the quality of food in our refrigerators and the health of our families."
--Jessica Kellner, Editor, Natural magazine
--Jessica Kellner, Editor, Natural magazine
Wednesday, October 3, 2012
pincushion mason jar

I've seen these adorable creations all over the internet lately. Have you? Well, I decided I needed to have one. And, as it happens, I had some scrap fabric and some extra batting, and I always have mason jars around. (Yes, I know.)
So! I set to work trying to create one. Turns out they're pretty easy. I searched all over the internet for a few good tutorials and decided to gather my favorite parts of each of them into my own tutorial. Here goes!
Supplies:

First, use the lid insert thing to cut out an over-sized circle. It should be at least an inch bigger all the way around (2 inches if you're measuring diameter). I made mine larger because it was my first one and I was worried it would be too small.


Next, use your handy hot glue gun to start gluing down the sides of the fabric to the underside of the lid. I pulled it reasonably tight without distorting the fabric. I also tried to glue everything down as evenly as possible.


Then, I trimmed the leftover fabric to make it as flat as possible. You could be done after this step if you wanted.

While this could be finished now, I thought maybe it would be nice to wrap up all those loose fabric bit. To the trusty bag of paper! I cut out a little circle of paper and hot glued it to the bottom.

Add it to your jar with the screw on lid, and voila! A handy jar to keep your pins, notions, sewing bits, buttons, thread, or whatever you please.

Friday, September 28, 2012
indeed
"Indeed, is that not everything? What more do you need? A little garden to walk in, and immensity to reflect on. At his feet something to cultivate and gather; above his head something to study and meditate on; a few flowers on earth and all the stars in heaven."
-- from Les Miserables, by Victor Hugo
-- from Les Miserables, by Victor Hugo
Wednesday, September 26, 2012
lunch bag craft
So.... in cased you missed it, I tried out some embroidery as a new craft. After the first project, I was hooked. But rather than start embroidering anything and everything around me, I figured I would pick out a few small projects to get started and try out my new art form.
About the same time I was brainstorming projects, I realized I had a serious need of a lunch bag. Since I've been cooking at home more often and eating more veggies and local produce, that means more lunches brought from home. I've been using grocery bags or shopping bags or anything around to carry lunches and containers back and forth.
In looking through all my craft supplies and miscellany I have stashed in various hiding places around the apartment, I came across a plain canvas bag. What luck! A lunch bag! And I didn't have to buy one!
And, to top things off, I could customize it with my new embroidery skills!

Do you like it?
I do! It's already been used almost every work day since.
Sunday, September 23, 2012
bread!

The first bread I've ever made by myself!
The bread is on the small side, and I used whole wheat flour in a recipe meant to white flour, so it didn't turn out quite perfect. It ended up being too hard after only a couple of days. Oops!
Although the hubby loved this bread while it was around -- and I'm quite proud of it -- I'm not ready to share the recipe until I find one that works more perfectly. Just thought I would share my triumph!
Saturday, September 22, 2012
one project at a time
"Maybe you aren't so into gardening, but would like to brew your own beer. Maybe you'd like to tinker with a greywater system for you house. Maybe you want to make your own non-toxic cleaning products. Try it! Start by doing just one project, one experiment, and you may well unleash the homesteader within."
-- The Urban Homestead, by Kelly Coyne and Erik Knutzen
-- The Urban Homestead, by Kelly Coyne and Erik Knutzen
Wednesday, September 19, 2012
news: triclosan is awful
Check out this article in the Smithsonian Magazine. A new study found that triclosan, and ingredient found in many many things marked "antibacterial" impairs muscle function in animals and humans.
Scary, huh? I think so.
Check your labels!
Tuesday, September 18, 2012
flower!
My very first flower from a plant I grew from seed!

I know it might seem like a small victory, but isn't it the small victories that make all the difference?
And look at the baby bud! A second flower on the way!

I know it might seem like a small victory, but isn't it the small victories that make all the difference?
And look at the baby bud! A second flower on the way!
Friday, September 14, 2012
building a home
Home wasn't built in a day.
--Jane Sherwood Ace
How true! Building a true home is always a work in progress.
Wednesday, September 12, 2012
egg noodles
Alright, so my first attempt at making egg noodles only went so-so. The noodles turned out very edible and I used them in soup, but they were a little too thick for my liking. C'est la vie. Lesson learned. Next time, I'll roll them thinner. Mind ended up kinda like chunky noodles.
To make them, I started with this recipe. However, the dough ended up a little too dry and leaving it for too long in the fridge made it unusable. I started a new batch and did it my own way!
Ingredients:
2 eggs
1/2 tsp of salt
flour (however much you need)
Directions:
1. Put the two eggs into a medium or small bowl and beat with a fork like you would for scrambled eggs.
2. Add in the salt and mix again.
3. Continue mixing with your fork and add in flour a tablespoon at a time until the dough comes together. When using a fork isn't practical, use your hands and knead in enough flour to make the dough not sticky.
4. Cover and throw in the fridge for half an hour or an hour or so.
5. On a well-floured surface, roll out the dough (half of the dough at a time!) to the desired thickness. I did mine a little thicker and ended up wishing I had made them much more thin. Rotate the dough when you need to and make sure it doesn't stick. It's awfully hard to pull stuck noodles off!
6. Using a sharp knife or a pizza cutter, cut your noodles! Leave them out while you get that soup started.
Sunday, September 9, 2012

Friday, September 7, 2012
Wednesday, September 5, 2012
chicken stock in the crockpot
A couple of weeks ago, I made stock for the very first time. I had no idea it was so easy! I did some recipe comparisons, mostly of this one and this one, and decided to try it for myself. Since I was going to be simmering the stock while I was at work, I went with the crockpot. I've done it a few times since, and I generally stick to this recipe. It tastes great, and it's full of vitamins (and not grease or sodium).
Ingredients:
1 chicken's worth of the leftover bits and bones (I made chicken the night before using a whole chicken, and used the leftover non-edible extras here.)
Carrots (I used a couple of organic carrots, cut into chunks)
Celery (same here...a few stalks cut into chunks)
Leftover veggies -- you don't have to add these. When I'm cutting up veggies for another meal and have leftover pieces like the tops of tomatoes or the leaves of celery or ends of cucumbers, I save them in a baggy in the freezer to use in stock. More vitamins!
Vinegar -- I used apple cider vinegar, but you don't have to
Directions:
1. Put the chicken bits and bones into the crockpot.
2. Fill crockpot with at least 4 quarts of cold, filtered water. Add one or two tablespoons of vinegar. I think I added one tablespoon, and I just fill up the crockpot with cold water.
3. Let sit for an hour or two. I used the time to pick up the kitchen and cut up the veggies.
4. Add veggies and turn crockpot on high for a little while. I did this for about an hour before I went to bed.
5. Turn crockpot down to low and let simmer for 18-24 hours.
6. You're done! Pour through a colander into a container (like a large bowl or pitcher), then pour into your final jars/containers. I pour mine slowly into pint sized jars, let them cool, then put them in the freezer. I pull a jar or two out and put them in the fridge a day or two before I know I'll be making a big meal and using stock.
This is the richest stock I think I have ever tasted, and I didn't add any salt, so it's not at all sodium-packed like the stock you can buy at the store. I generally end up with five or so pints of stock, but don't freak out if you don't. I don't use exact measurements for the water; I just fill it.
One more note: If you're putting stock in jars, make sure to fill them slowly. Glass breaks if you change the temperature too quickly, and you'll be so sad if a jar breaks! I've broken one or two already, and it's very disappointing to lose both the jar and the stock in it.
(Sorry there aren't any pictures! I got so excited about making it that I forgot to photograph!)
Sunday, September 2, 2012
Friday, August 31, 2012
a dream is a wish
"I still dream that someday I can support myself without an office job, and maybe someday I will. [...] After a few months on the farm, even the biggest crisis at work was just something to be dealt with calmly and rationally. Other employees would act like a deadline was a hurricane, but when you'd spent the morning deciding whether or not a rabbit with a broken spine would be put down, you couldn't really stress over PowerPoint presentations. Ironically, it was starting my own homestead that made me happier at work. Go figure."
--Made from Scratch, by Jenna Woginrich
--Made from Scratch, by Jenna Woginrich
Wednesday, August 29, 2012
canning peaches
It's peach season! And while peaches are cheaper than they are for the entire year, I thought this would be a perfect (and seasonal and local and good-for-us) time to try canning them.
The most helpful tutorial I found online for canning peaches is here. I'll leave you with a short summary version from my own canning adventures, but it would be a good idea to read the longer version.
Blanche the peaches to easily take the skin off, slice them, and put some lemon juice on them to keep from going brown.

Heat up some water (you won't need as much as you think), and add sugar as you bring it to a boil. When the water reaches a boil, add the peaches and boil for 5 minutes. Put the lids in a small sauce pan with some water, but make sure the water doesn't boil. You want the sticky stuff on the lid to be sticky, not falling off and ineffective.


With hot jars and hot peaches, load the peaches into the jars. Use a butter knife to run along the inside of the jar to release air bubbles. Add juice to the jars if necessary. Don't leave too much space.
Put the jars back in the canner, fill up until the jars are completely covered and have an extra 1 - 2 inches of water on top, put the lid on, and process for 25 minutes (for sea level locations.)

Voila! Canned peaches!
Monday, August 27, 2012
live simply
Look what my lovely husband got me for my birthday!

I told myself I wasn't allowed to start it until I finished the other project I was working on, but once I started, I was done in just two evenings.
.JPG)
Now to find a way to frame it!

I told myself I wasn't allowed to start it until I finished the other project I was working on, but once I started, I was done in just two evenings.
.JPG)
Now to find a way to frame it!
Friday, August 24, 2012
be cheerful!
I have always believed that being cheerful was an important part of life. Life doesn't always go the way you want it to: things aren't always happy, your home isn't always clean, family isn't always perfect, flowers don't always bloom.
Sometimes, it is a blessing just to be cheerful. Sometimes, that's the absolute best thing you can do that day: put on a smile and enjoy.
Sometimes, it is a blessing just to be cheerful. Sometimes, that's the absolute best thing you can do that day: put on a smile and enjoy.
“We have a mission to others--to add to their cheer. This we cannot do unless we have first learned the lesson of cheerfulness ourselves.”
-- J.R. Miller
Wednesday, August 22, 2012
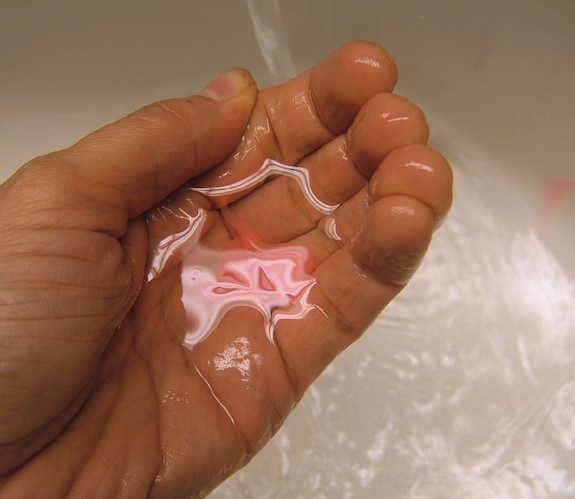
cleaning my home...better
 |
| photo via |
Recently, I started paying attention to statistics and facts about household cleaning products, home goods, and foods. Things started showing up all over blogs, I saw books on living healthier, and I have to admit, I was curious. Apparently, women who stay at home and are around household cleaning products have a significantly higher risk of cancer. And not eating healthy foods affects your daily health even more significantly. I don't mean just eating green beans, I mean eating fresh, non-canned, still crunchy from the farm green beans.
I'm trying to change some of the foods we eat, and I also decided to change the way we clean and, I must admit, it has worked out for the better so far.
I did tons of internet research on products to use, ratios for mixing your own, and all the different ways to make cleaning products.
I landed on a fairly good resource here. Just about everything can be cleaned with vinegar and baking soda, oddly enough.
I tried the all purpose cleaner to begin with. It turned out well! It cleans well, and with the oil, it smells good, too!
My recipe:
At least half a cup of vinegar. The amount depends on the purpose: more for all-purpose, less if you also want to clean glass. Max amount should be 1 part vinegar to 1 part water.
Water -- to fill up the rest of your spray bottle
Good smelling essential oil. My current favorite is lemongrass because it smells clean.
Steps:
1. Put vinegar into spray bottle. Fill up the rest of the bottle with water. Put in two or three drops of essential oil.
2. Shake.
3. Use!
The only comment I would add, is that if you're not using the cleaner for glass, I would add a bit more vinegar -- just for good measure. Because that's how I clean: if I'm going to put in the effort to clean it, it better be REALLY clean.
Sunday, August 19, 2012

Subscribe to:
Comments (Atom)